<?xml version="1.0" encoding="utf-8"?><feed xmlns="http://www.w3.org/2005/Atom" ><generator uri="https://jekyllrb.com/" version="4.4.1">Jekyll</generator><link href="https://overshifted.github.io/feed.xml" rel="self" type="application/atom+xml" /><link href="https://overshifted.github.io/" rel="alternate" type="text/html" /><updated>2026-05-30T19:49:12+03:30</updated><id>https://overshifted.github.io/feed.xml</id><title type="html">OverShifted’s Blog</title><entry><title type="html">Bad Apple but on ESP32-S3 &amp;amp; SSD1306 OLED</title><link href="https://overshifted.github.io/2025/08/18/badapple-but-on-ESP32-S3.html" rel="alternate" type="text/html" title="Bad Apple but on ESP32-S3 &amp;amp; SSD1306 OLED" /><published>2025-08-18T00:00:00+03:30</published><updated>2025-08-18T00:00:00+03:30</updated><id>https://overshifted.github.io/2025/08/18/badapple-but-on-ESP32-S3</id><content type="html" xml:base="https://overshifted.github.io/2025/08/18/badapple-but-on-ESP32-S3.html"><![CDATA[<!-- 
<figure class="highlight"><pre><code class="language-plaintext" data-lang="plaintext"><table class="rouge-table"><tbody><tr><td class="gutter gl"><pre class="lineno">1
2
</pre></td><td class="code"><pre><span class="hll">foo
</span>bar
</pre></td></tr></tbody></table></code></pre></figure>


<figure class="highlight"><pre><code class="language-plaintext" data-lang="plaintext"><table class="rouge-table"><tbody><tr><td class="gutter gl"><pre class="lineno">1
2
</pre></td><td class="code"><pre>foo
bar
</pre></td></tr></tbody></table></code></pre></figure>


<figure class="highlight"><pre><code class="language-java" data-lang="java"><table class="rouge-table"><tbody><tr><td class="gutter gl"><pre class="lineno">1
2
3
4
5
6
7
</pre></td><td class="code"><pre><span class="kd">public</span> <span class="kd">class</span> <span class="nc">HelloWorld</span>
<span class="o">{</span>
    <span class="kd">public</span> <span class="kd">static</span> <span class="kt">void</span> <span class="nf">main</span><span class="o">(</span><span class="nc">String</span><span class="o">[]</span> <span class="n">args</span><span class="o">)</span>
    <span class="o">{</span>
<span class="hll">        <span class="nc">System</span><span class="o">.</span><span class="na">out</span><span class="o">.</span><span class="na">println</span><span class="o">(</span><span class="s">"Hello, World"</span><span class="o">);</span>
</span>    <span class="o">}</span>
<span class="o">}</span>
</pre></td></tr></tbody></table></code></pre></figure>
 -->

<!-- 
<figure class="highlight"><pre><code class="language-java" data-lang="java"><table class="rouge-table"><tbody><tr><td class="gutter gl"><pre class="lineno">1
2
3
4
5
6
7
8
9
10
</pre></td><td class="code"><pre><span class="kd">public</span> <span class="kd">class</span> <span class="nc">HelloWorld</span> <span class="o">{</span>
    
    <span class="c1">// Your program begins with a call to main()</span>
    <span class="kd">public</span> <span class="kd">static</span> <span class="kt">void</span> <span class="nf">main</span><span class="o">(</span><span class="nc">String</span><span class="o">[]</span> <span class="n">args</span><span class="o">)</span>
    <span class="o">{</span>
<span class="hll">        <span class="c1">// Prints "Hello, World" to the terminal window. Prints  "Hello, World</span>
</span>        <span class="c1">// Prints "Hello, World" to the terminal window. Prints  "Hello, World</span>
        <span class="nc">System</span><span class="o">.</span><span class="na">out</span><span class="o">.</span><span class="na">println</span><span class="o">(</span><span class="s">"Hello, World"</span><span class="o">);</span>
    <span class="o">}</span>
<span class="o">}</span>
</pre></td></tr></tbody></table></code></pre></figure>
 -->

<figure class="highlight"><pre><code class="language-java" data-lang="java"><table class="rouge-table"><tbody><tr><td class="gutter gl"><pre class="lineno">1
2
3
4
5
6
7
8
9
</pre></td><td class="code"><pre><span class="kd">public</span> <span class="kd">class</span> <span class="nc">HelloWorld</span> <span class="o">{</span>
    
    <span class="c1">// Your program begins with a call to main()</span>
    <span class="kd">public</span> <span class="kd">static</span> <span class="kt">void</span> <span class="nf">main</span><span class="o">(</span><span class="nc">String</span><span class="o">[]</span> <span class="n">args</span><span class="o">)</span>
    <span class="o">{</span>
        <span class="c1">// Prints "Hello, World" to the terminal window. Prints  "Hello, World</span>
        <span class="nc">System</span><span class="o">.</span><span class="na">out</span><span class="o">.</span><span class="na">println</span><span class="o">(</span><span class="s">"Hello, World"</span><span class="o">);</span>
    <span class="o">}</span>
<span class="o">}</span>
</pre></td></tr></tbody></table></code></pre></figure>

<p>I just got my first little SSD1306 OLED screen and wanted to do something cool with
it after running some tests. So as any sane person would do, I decided
to show <a href="https://www.youtube.com/watch?v=9lNZ_Rnr7Jc">Bad Apple</a> on it; just to remember
I don’t have enough brain cells left to pull it off by myself. So I searched the web
and found this great project: <a href="https://github.com/hackffm/ESP32_BadApple">hackffm/ESP32_BadApple</a>.
They deserve most of the credit, since everything I did was based on their excellent work.</p>

<p>The repo contains compressed video data, and an Arduino sketch along with a few <code class="language-plaintext highlighter-rouge">C++</code> files
to decompress and display the actual video frames, which are stored on the microcontroller’s
flash as a separate filesystem called <a href="https://github.com/pellepl/spiffs">SPIFFS</a>,
along with the code that we upload to the microcontroller. The problem is that SPIFFS data
need to be uploaded manually, as Arduino IDE itself is not quite aware of it.</p>

<p>Fortunately, the repo includes instructions for that, which points us to
<a href="https://github.com/me-no-dev/arduino-esp32fs-plugin">an Arduino plugin</a>—but
that plugin no longer works with the newer 2.x.x versions of the IDE. Still, nothing stops us from reading
the plugins source code and replicating it’s functionality ourselves.</p>

<h2 id="getting-our-feet-wet">Getting our feet wet</h2>
<p>A skim through <a href="https://github.com/me-no-dev/arduino-esp32fs-plugin/blob/master/src/ESP32FS.java#L379">ESP32FS.java</a>
reveals that we just need to figure out three steps:</p>
<ol>
  <li>
    <p><a href="https://github.com/me-no-dev/arduino-esp32fs-plugin/blob/9ef3bcd665b8f9dd227f3eac8b966861cfe5e5a4/src/ESP32FS.java#L212"><strong>Read the partition table</strong></a>
 by <a href="https://github.com/me-no-dev/arduino-esp32fs-plugin/blob/9ef3bcd665b8f9dd227f3eac8b966861cfe5e5a4/src/ESP32FS.java#L222">opening</a> the selected partition
 table’s csv file and <a href="https://github.com/me-no-dev/arduino-esp32fs-plugin/blob/9ef3bcd665b8f9dd227f3eac8b966861cfe5e5a4/src/ESP32FS.java#L233">looking for</a>
 the spiffs entry to figure out it’s size and offset into the flash.</p>
  </li>
  <li>
    <p><a href="https://github.com/me-no-dev/arduino-esp32fs-plugin/blob/9ef3bcd665b8f9dd227f3eac8b966861cfe5e5a4/src/ESP32FS.java#L340"><strong>Create an SPIFFS image.</strong></a>
This is pretty straight forward: Just invoke <a href="https://github.com/igrr/mkspiffs"><code class="language-plaintext highlighter-rouge">mkspiffs</code></a>
on the sketch’s <code class="language-plaintext highlighter-rouge">data/</code> directory as we see in the plugin code:</p>

    <div class="language-java highlighter-rouge"><div class="highlight"><pre class="highlight"><code><span class="k">if</span> <span class="o">(</span><span class="n">listenOnProcess</span><span class="o">(</span><span class="k">new</span> <span class="nc">String</span><span class="o">[]</span> <span class="o">{</span>
    <span class="n">toolPath</span><span class="o">,</span>                <span class="c1">// Path to the mkspiffs binary</span>
    <span class="s">"-c"</span><span class="o">,</span> <span class="n">dataPath</span><span class="o">,</span>          <span class="c1">// Path to the data directory</span>
    <span class="s">"-p"</span><span class="o">,</span> <span class="n">spiPage</span><span class="o">+</span><span class="s">""</span><span class="o">,</span>        <span class="c1">// spiPage = 256 (constant)</span>
    <span class="s">"-b"</span><span class="o">,</span> <span class="n">spiBlock</span><span class="o">+</span><span class="s">""</span><span class="o">,</span>       <span class="c1">// spiBlock = 4096 (constant)</span>
    <span class="s">"-s"</span><span class="o">,</span> <span class="n">spiSize</span><span class="o">+</span><span class="s">""</span><span class="o">,</span>        <span class="c1">// Read from partition table</span>
    <span class="n">imagePath</span>
<span class="o">})</span> <span class="o">!=</span> <span class="mi">0</span><span class="o">)</span> <span class="c1">// ...</span>
</code></pre></div>    </div>
  </li>
  <li>
    <p><a href="https://github.com/me-no-dev/arduino-esp32fs-plugin/blob/9ef3bcd665b8f9dd227f3eac8b966861cfe5e5a4/src/ESP32FS.java#L374"><strong>Writing the image to ESP32’s flash</strong></a>
with <code class="language-plaintext highlighter-rouge">esptool.py</code> (or send it over the network with <code class="language-plaintext highlighter-rouge">espota.py</code>, in which case
we don’t need to explicitly specify the partition address):</p>
    <div class="language-java highlighter-rouge"><div class="highlight"><pre class="highlight"><code><span class="n">sysExec</span><span class="o">(</span><span class="k">new</span> <span class="nc">String</span><span class="o">[]</span> <span class="o">{</span>
    <span class="c1">// Path to esptool.py (or a binary executable variant)</span>
    <span class="n">esptool</span><span class="o">.</span><span class="na">getAbsolutePath</span><span class="o">(),</span>

    <span class="s">"--chip"</span><span class="o">,</span> <span class="n">mcu</span><span class="o">,</span>          <span class="c1">// Chip variant (in this case, 'esp32s3'), read from Arduino's configuration</span>
    <span class="s">"--baud"</span><span class="o">,</span> <span class="n">uploadSpeed</span><span class="o">,</span>  <span class="c1">// The upload speed to use, read from Arduino's configuration</span>

    <span class="c1">// The serial port that is connected to the micro, read from Arduino</span>
    <span class="c1">// (e.g. /dev/ttyACM0, /dev/ttyUSB0, or something else on other OSes)</span>
    <span class="s">"--port"</span><span class="o">,</span> <span class="n">serialPort</span><span class="o">,</span>

    <span class="s">"--before"</span><span class="o">,</span> <span class="s">"default_reset"</span><span class="o">,</span>
    <span class="s">"--after"</span><span class="o">,</span> <span class="s">"hard_reset"</span><span class="o">,</span>
    <span class="s">"write_flash"</span><span class="o">,</span>
    <span class="s">"-z"</span><span class="o">,</span>  <span class="c1">// Compress data in transfer</span>

    <span class="c1">// The flash mode to use (and set), read from Arduino's configuration</span>
    <span class="c1">// (See https://docs.espressif.com/projects/esptool/en/latest/esp32/advanced-topics/spi-flash-modes.html)</span>
    <span class="s">"--flash_mode"</span><span class="o">,</span> <span class="n">flashMode</span><span class="o">,</span>

    <span class="c1">// The flash frequency to use (and set), read from Arduino's configuration</span>
    <span class="c1">// (See https://docs.espressif.com/projects/esptool/en/latest/esp32s3/esptool/flash-modes.html#flash-frequency-flash-freq-ff)</span>
    <span class="s">"--flash_freq"</span><span class="o">,</span> <span class="n">flashFreq</span><span class="o">,</span>

    <span class="c1">// The flash size to set</span>
    <span class="c1">// (See https://docs.espressif.com/projects/esptool/en/latest/esp32s3/esptool/flash-modes.html#flash-size-flash-size-fs)</span>
    <span class="s">"--flash_size"</span><span class="o">,</span> <span class="s">"detect"</span><span class="o">,</span>

    <span class="c1">// The address to begin writing the image to (read from the partition table)</span>
    <span class="s">""</span><span class="o">+</span><span class="n">spiStart</span><span class="o">,</span>
        
    <span class="n">imagePath</span>
<span class="o">});</span>
</code></pre></div>    </div>
    <p>Before panicking: many of these flags are not required. <code class="language-plaintext highlighter-rouge">-z</code> is enabled by default,
flash options can be ommited to use device defaults, chip type can be detected automatically,
and <code class="language-plaintext highlighter-rouge">--before</code> and <code class="language-plaintext highlighter-rouge">--after</code> flags are not quite necessary as the chip will be
hard-reset after <code class="language-plaintext highlighter-rouge">write_flash</code> anyway.</p>
  </li>
</ol>

<h3 id="reading-the-partition-table">Reading the partition table</h3>
<p>The partition table is set by the Arduino IDE when writing the firmware on the flash.
So to know what partition table is currently being written, There are a couple of options:</p>
<ol>
  <li><strong>See what Arduino is configured to use</strong> by looking in the <code class="language-plaintext highlighter-rouge">Tools</code> menu:
 <img src="/assets/bad-apple-esp32s3/tools-menu.png" alt="tools_menu" /> then search Arduino package files
 for the partition table’s csv file. They are located somewhere like
 <code class="language-plaintext highlighter-rouge">~/.arduino15/packages/esp32/hardware/esp32/x.y.z/tools/partitions/</code>:
    <div class="language-sh highlighter-rouge"><div class="highlight"><pre class="highlight"><code> <span class="nv">$ </span><span class="nb">ls</span> ~/.arduino15/packages/esp32/hardware/esp32/3.2.0/tools/partitions/
 app3M_fat9M_16MB.csv              esp_sr_16.csv                               minimal.csv                  tinyuf2-partitions-16MB-noota.csv
 app3M_fat9M_fact512k_16MB.csv     ffat.csv                                    min_spiffs.csv               tinyuf2-partitions-4MB.csv
 app3M_spiffs9M_fact512k_16MB.csv  huge_app.csv                                no_fs.csv                    tinyuf2-partitions-4MB-noota.csv
 bare_minimum_2MB.csv              large_fat_32MB.csv                          noota_3g.csv                 tinyuf2-partitions-8MB.csv
 boot_app0.bin                     large_ffat_8MB.csv                          noota_3gffat.csv             tinyuf2-partitions-8MB-noota.csv
 default_16MB.csv                  large_littlefs_32MB.csv                     no_ota.csv                   zigbee_2MB.csv
 default_32MB.csv                  large_spiffs_16MB.csv                       noota_ffat.csv               zigbee_8MB.csv
 default_8MB.csv                   large_spiffs_8MB.csv                        ota_nofs_4MB.csv             zigbee.csv
 default.bin                       m5stack_partitions_16MB_factory_4_apps.csv  rainmaker_4MB_no_ota.csv     zigbee_zczr_2MB.csv
 default.csv                       m5stack_partitions_16MB_factory_6_apps.csv  rainmaker_8MB.csv            zigbee_zczr_8MB.csv
 default_ffat_8MB.csv              max_app_4MB.csv                             rainmaker.csv                zigbee_zczr.csv
 default_ffat.csv                  max_app_8MB.csv                             tinyuf2-partitions-16MB.csv
</code></pre></div>    </div>
    <p>In this case, it is the <code class="language-plaintext highlighter-rouge">default.csv</code>. However if you are unsure, you can
 use the second method below.</p>
  </li>
  <li>or <strong>Read the partition table directly from the flash</strong>. There is an offset into
 the flash where the partition table is written in binary which varies between different
 <a href="https://docs.espressif.com/projects/esp-idf/en/stable/esp32/api-reference/kconfig-reference.html#config-partition-table-offset">configurations</a>,
 but the <a href="https://docs.espressif.com/projects/esp-idf/en/stable/esp32/api-guides/partition-tables.html">default offset</a>
 is <code class="language-plaintext highlighter-rouge">0x8000</code> and the table size is <code class="language-plaintext highlighter-rouge">0xC00</code> bytes.</li>
</ol>

<p>Knowing that, we can continue by dumping that section into a file:</p>
<div class="language-sh highlighter-rouge"><div class="highlight"><pre class="highlight"><code>esptool.py <span class="nt">--port</span> /dev/ttyACM0 read_flash 0x8000 0xc00 partition-table.bin
</code></pre></div></div>
<p>Then, we parse the binary to csv:</p>
<div class="language-sh highlighter-rouge"><div class="highlight"><pre class="highlight"><code>gen_esp32part.py partition-table.bin
</code></pre></div></div>
<p>(The <code class="language-plaintext highlighter-rouge">gen_esp32part.py</code> script is included with ESP-IDF and Arduino’s ESP32 package.
You can try searching for it in the Arduino package files if you have trouble finding it)</p>

<p>Anyhow, we now have a csv file which looks like this:</p>

<figure class="highlight"><pre><code class="language-csv" data-lang="csv"><table class="rouge-table"><tbody><tr><td class="gutter gl"><pre class="lineno">1
2
3
4
5
6
7
</pre></td><td class="code"><pre># Name,   Type, SubType, Offset,  Size, Flags
nvs,      data, nvs,     0x9000,  0x5000,
otadata,  data, ota,     0xe000,  0x2000,
app0,     app,  ota_0,   0x10000, 0x140000,
app1,     app,  ota_1,   0x150000,0x140000,
<span class="hll">spiffs,   data, spiffs,  0x290000,0x160000,
</span>coredump, data, coredump,0x3F0000,0x10000,
</pre></td></tr></tbody></table></code></pre></figure>

<p>Just note down the <code class="language-plaintext highlighter-rouge">Offset</code> and <code class="language-plaintext highlighter-rouge">Size</code> fields of the <code class="language-plaintext highlighter-rouge">spiffs</code> partition.
Depending on the method used to get this csv table, these numbers might
be in hex, decimal and may or may not have postfixes. Remember to assume
<a href="https://en.wikipedia.org/wiki/Binary_prefix">binary prefixes</a> (e.g 1024
instead of 1000) for the postfixes. Also, all these values are in bytes.</p>

<h3 id="creating-the-spiffs-image">Creating the SPIFFS image</h3>
<p>Easy, just run this and make sure to replace the number after <code class="language-plaintext highlighter-rouge">-s</code> with
whatever SPIFFS partition size you had:</p>
<div class="language-sh highlighter-rouge"><div class="highlight"><pre class="highlight"><code>mkspiffs <span class="nt">-c</span> data/ <span class="nt">-p</span> 256 <span class="nt">-b</span> 4096 <span class="nt">-s</span> 1441792 spiffs.bin
</code></pre></div></div>
<p>(Again, <code class="language-plaintext highlighter-rouge">mkspiffs</code> is included in Arduino package files)</p>

<h3 id="write-the-image-to-esp32s-flash">Write the image to ESP32’s flash</h3>
<p>At this point, this is also pretty easy to do (Don’t froget to replace <code class="language-plaintext highlighter-rouge">2686976</code>
with your SPIFFS partition offset):</p>
<div class="language-sh highlighter-rouge"><div class="highlight"><pre class="highlight"><code>esptool.py               <span class="se">\</span>
  <span class="nt">--chip</span> esp32s3         <span class="se">\</span>
  <span class="nt">--baud</span> 921600          <span class="se">\</span>
  <span class="nt">--port</span> /dev/ttyACM0    <span class="se">\</span>
  <span class="nt">--before</span> default_reset <span class="se">\</span>
  <span class="nt">--after</span> hard_reset     <span class="se">\</span>
  write_flash            <span class="se">\</span>
  <span class="nt">-z</span>                     <span class="se">\</span>
  <span class="nt">--flash_mode</span> qio       <span class="se">\</span>
  <span class="nt">--flash_freq</span> 80m       <span class="se">\</span>
  <span class="nt">--flash_size</span> detect    <span class="se">\</span>
  2686976 ./spiffs.bin
</code></pre></div></div>
<p>All these values can be gathered from the same <code class="language-plaintext highlighter-rouge">Tools</code> menu mentioned above.
But remember, this command can be simplified since alot of these flags are
not mandatory:</p>
<div class="language-sh highlighter-rouge"><div class="highlight"><pre class="highlight"><code>esptool.py <span class="nt">--baud</span> 921600 <span class="nt">--port</span> /dev/ttyACM0 write_flash 2686976 ./spiffs.bin
</code></pre></div></div>
<p>(I kept <code class="language-plaintext highlighter-rouge">--baud</code> because the default rate was too slow. If you experience any weired
behavior, consider removing this flag or using lower baud rates.)</p>

<h2 id="final-thoughts">Final thoughts</h2>
<p>Although this method works perfectly fine for this example, there are many other
<a href="https://docs.espressif.com/projects/esp-idf/en/stable/esp32/api-guides/file-system-considerations.html">options</a>
when it comes to mounting a filesystem on the ESP32, such as
<a href="https://docs.espressif.com/projects/esp-idf/en/stable/esp32/api-guides/file-system-considerations.html#fatfs-fs-section">FatFS</a> or
<a href="https://docs.espressif.com/projects/esp-idf/en/stable/esp32/api-guides/file-system-considerations.html#littlefs-fs-section">LittleFS</a>
which can both operate on the SPI flash as well as on an SD card. They also
<a href="https://github.com/espressif/esp-idf/tree/v5.5/examples/storage/perf_benchmark">perform</a>
differently. So you might want to choose a different one depending on your needs.</p>

<h2 id="epilogueealisdjaewr">Epilogueealisdjaewr?</h2>
<p>Finally, it’s time to enjoy watching Bad Apple on the OLED screen with a cup of warm
coffee ☕.</p>

<video width="100%" controls="">
  <source src="/assets/bad-apple-esp32s3/hero.mp4" type="video/mp4" />
</video>

<p>The only thing it lacks, is the audio that was added on top of the video with editing software.
I really hope some day I comeback to this type of stuff and maybe make a version with audio.
Until then!</p>

<ol>
  <li>Foo</li>
  <li>Bar
    <div class="language-plaintext highlighter-rouge"><div class="highlight"><pre class="highlight"><code>baz
</code></pre></div>    </div>
  </li>
</ol>

<div class="language-plaintext highlighter-rouge"><div class="highlight"><pre class="highlight"><code>boo
</code></pre></div></div>

<ol>
  <li>First item</li>
  <li>
    <p>Second item with code:</p>

    <div class="language-cpp highlighter-rouge"><div class="highlight"><pre class="highlight"><code><span class="cp">#include</span> <span class="cpf">&lt;iostream&gt;</span><span class="cp">
</span><span class="kt">int</span> <span class="nf">main</span><span class="p">()</span> <span class="p">{</span>
    <span class="n">std</span><span class="o">::</span><span class="n">cout</span> <span class="o">&lt;&lt;</span> <span class="s">"Hello, world!"</span> <span class="o">&lt;&lt;</span> <span class="n">std</span><span class="o">::</span><span class="n">endl</span><span class="p">;</span>
    <span class="k">return</span> <span class="mi">0</span><span class="p">;</span>
<span class="p">}</span>
</code></pre></div>    </div>
  </li>
  <li>Third item</li>
</ol>

<div class="language-cpp highlighter-rouge"><div class="highlight"><pre class="highlight"><code><span class="cp">#include</span> <span class="cpf">&lt;iostream&gt;</span><span class="cp">
</span><span class="kt">int</span> <span class="nf">main</span><span class="p">()</span> <span class="p">{</span>
    <span class="n">std</span><span class="o">::</span><span class="n">cout</span> <span class="o">&lt;&lt;</span> <span class="s">"Hello, world!"</span> <span class="o">&lt;&lt;</span> <span class="n">std</span><span class="o">::</span><span class="n">endl</span><span class="p">;</span>
    <span class="k">return</span> <span class="mi">0</span><span class="p">;</span>
<span class="p">}</span>
</code></pre></div></div>]]></content><author><name></name></author><summary type="html"><![CDATA[I just wanted to test my new OLED screen, and ended up manipulating the partition table :)]]></summary></entry><entry><title type="html">Cracking River Raid with Stella emulator</title><link href="https://overshifted.github.io/2021/08/28/cracking-river-raid.html" rel="alternate" type="text/html" title="Cracking River Raid with Stella emulator" /><published>2021-08-28T11:23:00+04:30</published><updated>2021-08-28T11:23:00+04:30</updated><id>https://overshifted.github.io/2021/08/28/cracking-river-raid</id><content type="html" xml:base="https://overshifted.github.io/2021/08/28/cracking-river-raid.html"><![CDATA[<p>River Raid is an old Atari game where you should fly over a river without hitting hills, ships and other aircrafts, without running out of fuel.
And this is how I managed to crack the game by changing its assembly code, in a way that I will never lose the game.</p>

<h2 id="getting-started">Getting started</h2>
<p>To follow this guide, you are going to an emulator to <em>emulate</em> a real Atari device and the River Raid ROM (RRR? :) file. I’ve decided to use the <a href="https://stella-emu.github.io">Stella emulator</a> and I found a copy of the ROM file <a href="http://www.atarimania.com/game-atari-2600-vcs-river-raid_s6826.html">here</a>.</p>

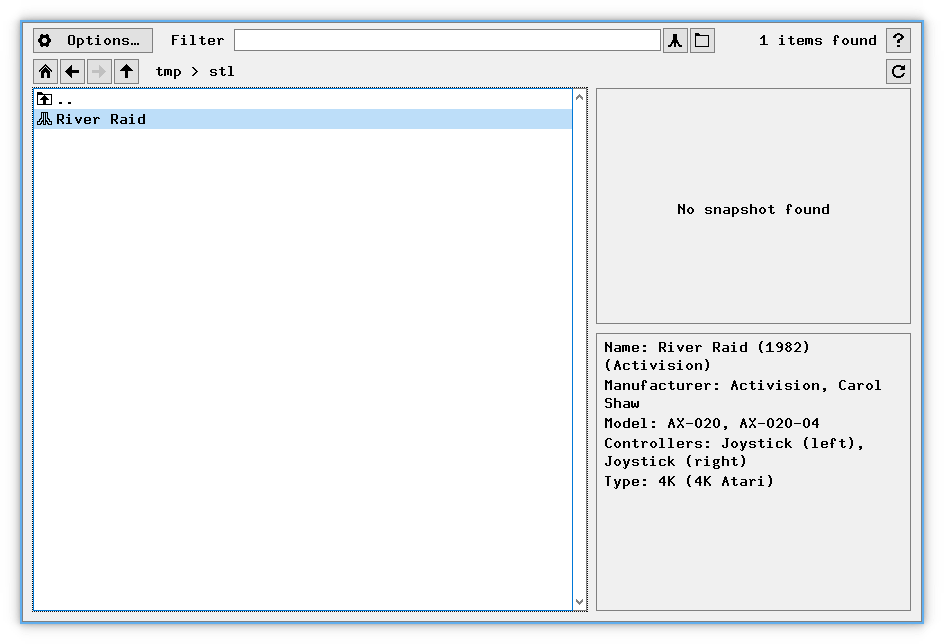
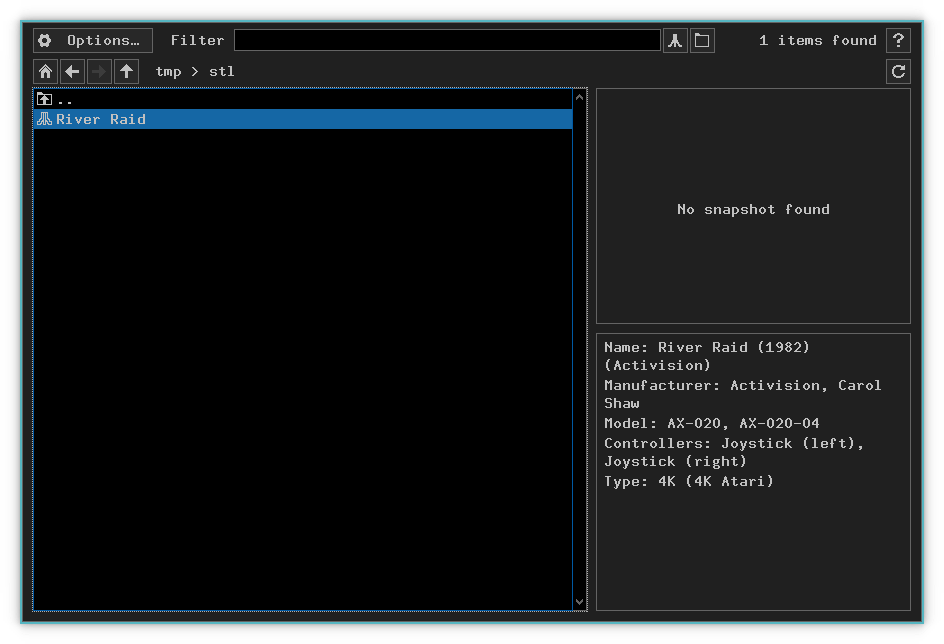
<p>Now, run Stella and find the downloaded ROM file (It is probably a <code class="language-plaintext highlighter-rouge">.zip</code> file), you should see something like this:</p>

<blockquote>
  <p><strong>NOTE:</strong> If you are using an older version of Stella, you might need to manually unzip the file and look for the <code class="language-plaintext highlighter-rouge">.bin</code> file inside it.</p>
</blockquote>

<p style="position: relative;">
<img class="hide-in-dark-mode" alt="stella_home" src="/assets/cracking-river-raid/1l.png" />
<img class="hide-in-light-mode" alt="stella_home" src="/assets/cracking-river-raid/1d.png" />
</p>

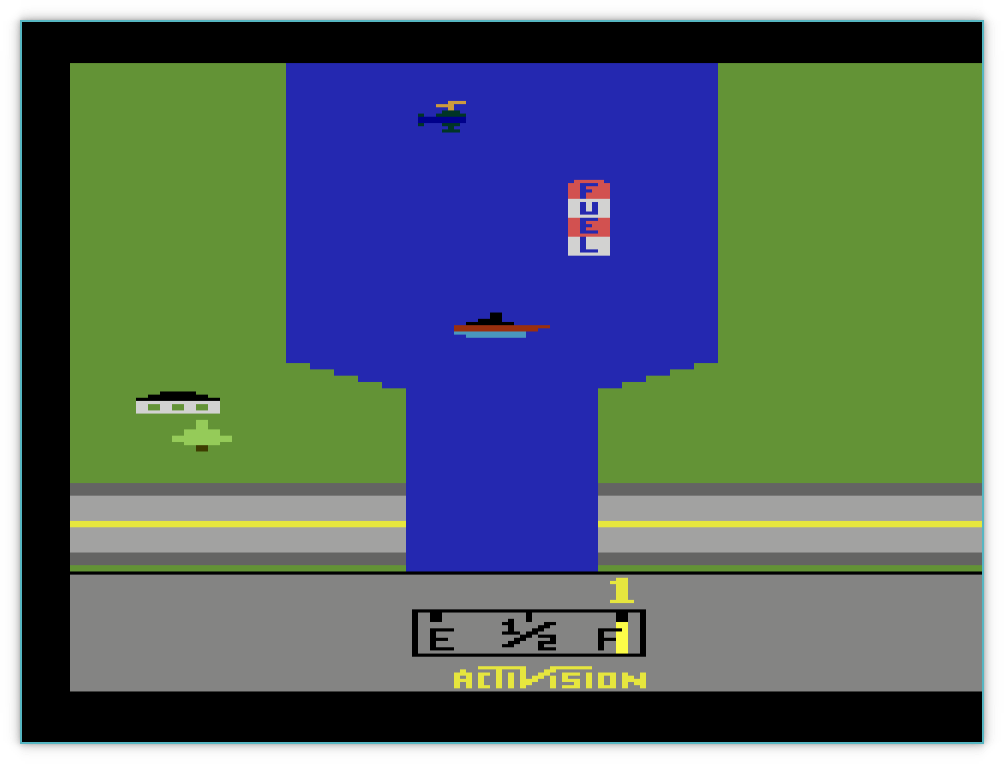
<p>Then, load the ROM by double-clicking on it. The game should start running:</p>

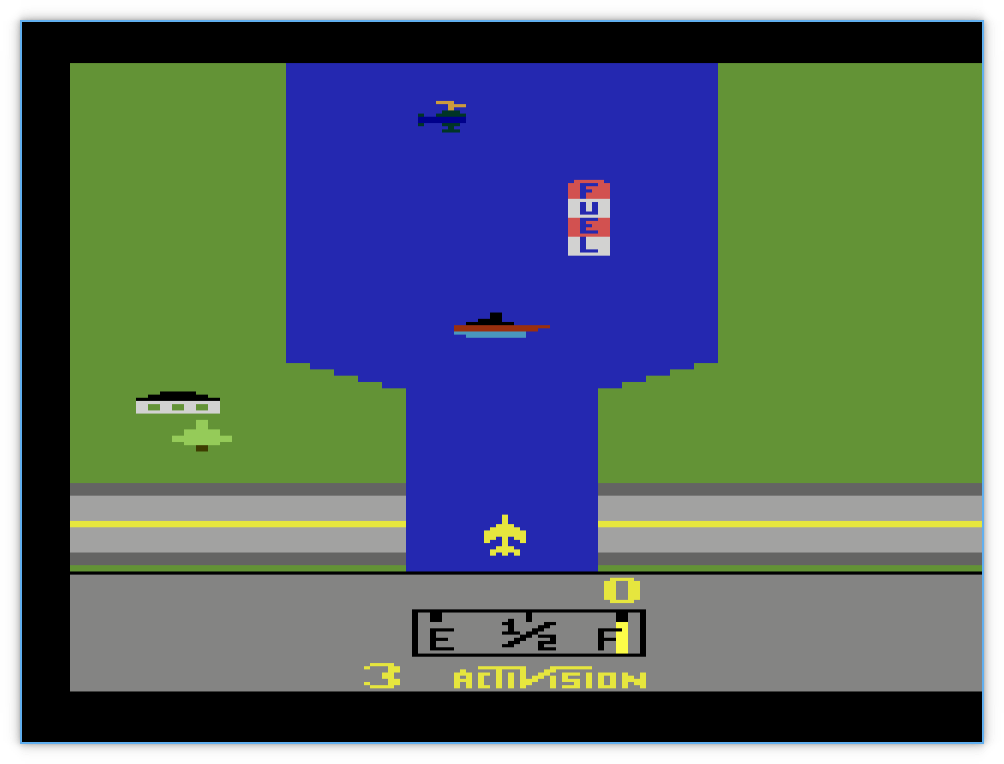
<p><img src="/assets/cracking-river-raid/2.png" alt="stella_running_river_raid" /></p>

<p>But, to <em>really</em> start the game on a real Atari, you need to press the <code class="language-plaintext highlighter-rouge">reset</code> button. On Stella, this key is mapped to <code class="language-plaintext highlighter-rouge">F2</code> by default. So press it and start playing the game. Right and left arrows will move the player and space will fire some missiles.</p>

<p><img src="/assets/cracking-river-raid/3.png" alt="playing_river_raid_on_stella" /></p>

<p>There are three ways to lose the game:</p>
<ol>
  <li>Colliding with ships, aircrafts and bridges 🚁</li>
  <li>Colliding with hills 🌲 (green parts)</li>
  <li>Running out of fuel ⛽</li>
</ol>

<p>Two first “ways” of losing are pretty similar, but are handled quite differently in the game.</p>

<h2 id="collision-detection">Collision detection</h2>
<p>Unlike modern games which usually use seprated systems for rendering and physics, older games detected collisions between different objects while rendering.
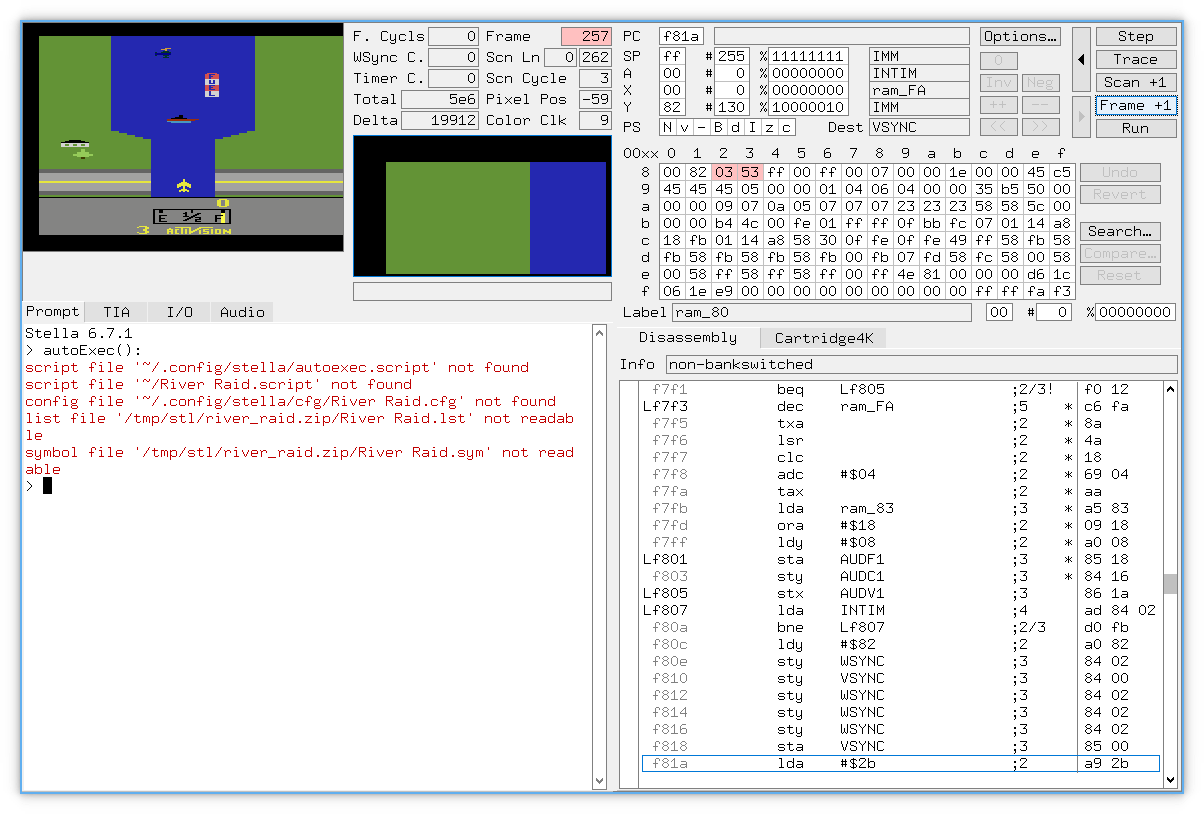
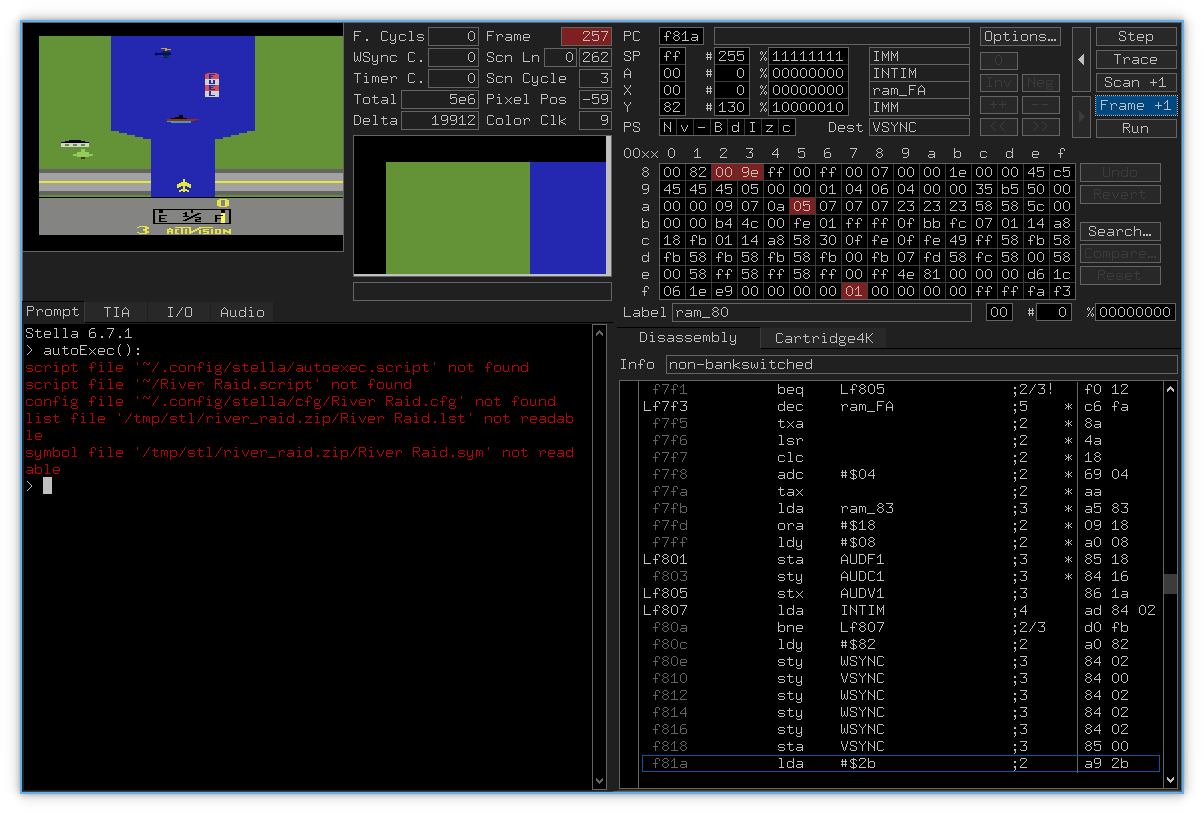
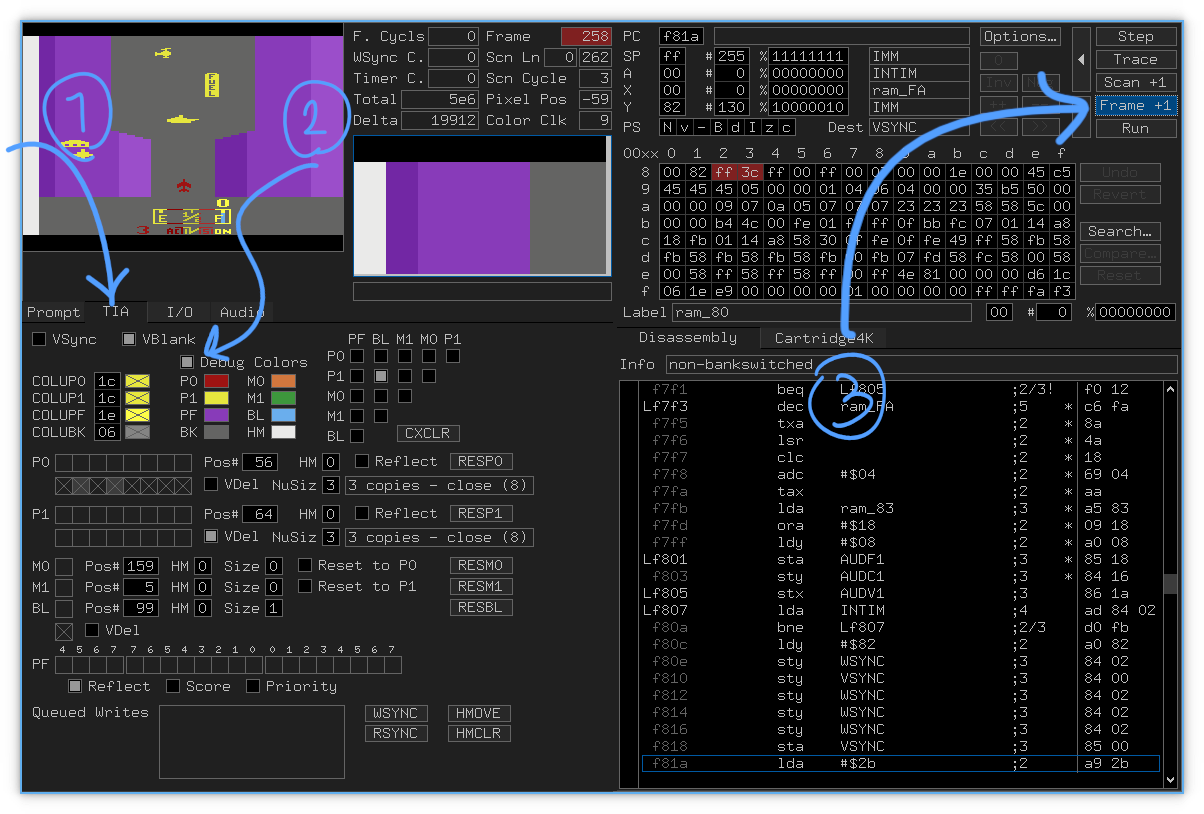
Atari lets you define a limited number of sprites, with limited sizes. Then you can tell the system where to render these sprites. During rendering, when the scanline “scans” the screen, the system also checks for collision between those sprites and changes some registers accordingly. To explore this, press the <code class="language-plaintext highlighter-rouge">~</code> key (next to <code class="language-plaintext highlighter-rouge">1</code>) to enter Stella’s debug mode. the game will be paused automatically.</p>

<p style="position: relative;">
<img class="hide-in-dark-mode" alt="stella_debug_mode" src="/assets/cracking-river-raid/4l.png" />
<img class="hide-in-light-mode" alt="stella_debug_mode" src="/assets/cracking-river-raid/4d.png" />
</p>

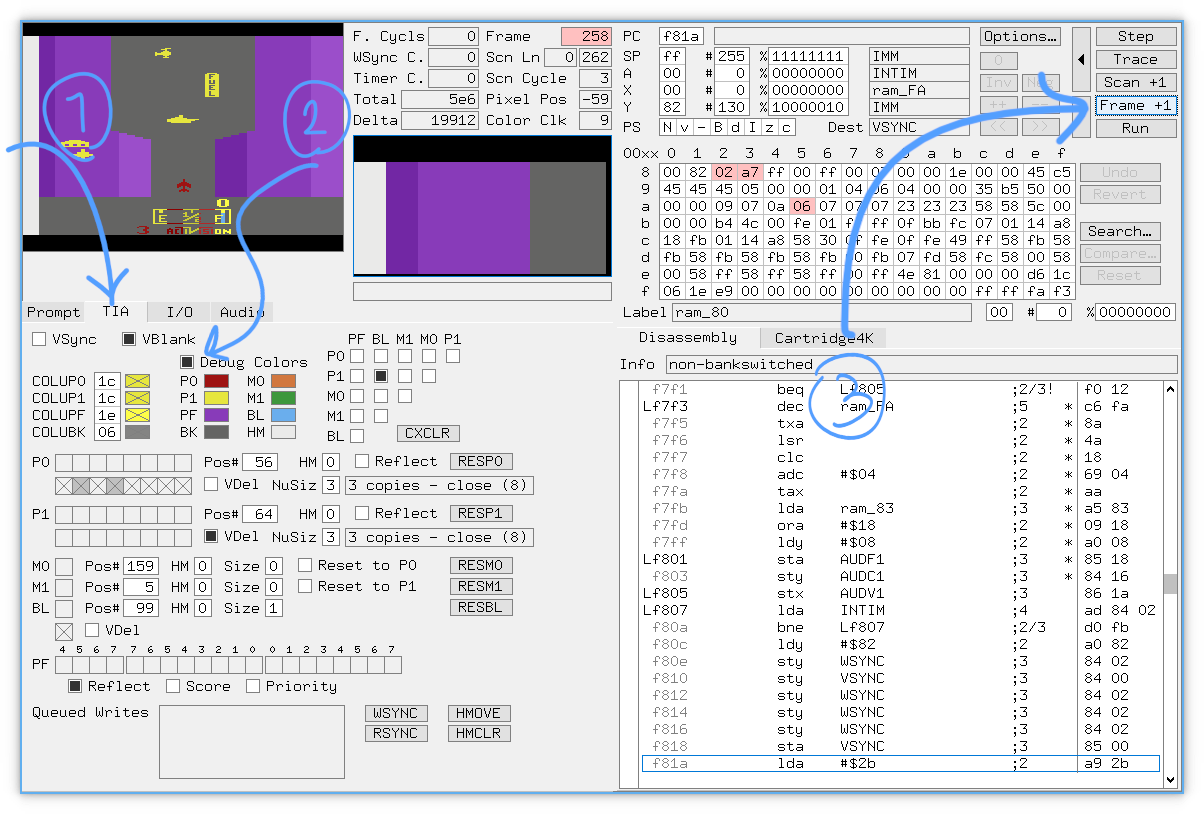
<p>Head over to <code class="language-plaintext highlighter-rouge">TIA</code> tab to see graphics and collision information. Then, check the <code class="language-plaintext highlighter-rouge">Debug Colors</code> option. It will allow us to detect where sprites are rendered on the screen. To see the changes, click the <code class="language-plaintext highlighter-rouge">Frame +1</code> button to render the next frame with debug colors.</p>

<p style="position: relative;">
<img class="hide-in-dark-mode" alt="tia_tab" src="/assets/cracking-river-raid/5l-overlay.png" />
<img class="hide-in-light-mode" alt="tia_tab" src="/assets/cracking-river-raid/5d-overlay.png" />
</p>

<p>It will show us a weird looking image. As you can see:</p>

<ol>
  <li>Player is rendered in red.</li>
  <li>Enemies and fuel (gas) stations are rendered in yellow.</li>
  <li>Hills are rendered in purple.</li>
</ol>

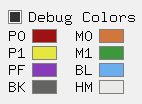
<p>By looking at the colors under the <code class="language-plaintext highlighter-rouge">Debug Colors</code> checkbox, You can see which <em>sprite code</em> is associated with each part of the screen.</p>

<p style="position: relative;">
<img class="hide-in-dark-mode" alt="color_codes" src="/assets/cracking-river-raid/6l-cropped.png" />
<img class="hide-in-light-mode" alt="color_codes" src="/assets/cracking-river-raid/6d-cropped.png" />
</p>

<table>
  <thead>
    <tr>
      <th>Object Name</th>
      <th>Atari Sprite ID</th>
    </tr>
  </thead>
  <tbody>
    <tr>
      <td>Player</td>
      <td>P0</td>
    </tr>
    <tr>
      <td>Enemies and fuel</td>
      <td>P1 (Although not exactly a player)</td>
    </tr>
    <tr>
      <td>Hills</td>
      <td>PF</td>
    </tr>
  </tbody>
</table>

<p>We can use the sprite ID of each object to check for collisions of that object.
For example to check for collisions between <code class="language-plaintext highlighter-rouge">Player</code> and <code class="language-plaintext highlighter-rouge">Enemies</code>, you can check for collision between <code class="language-plaintext highlighter-rouge">P0</code> and <code class="language-plaintext highlighter-rouge">P1</code>.</p>

<h3 id="collision-registers">Collision Registers</h3>
<p>There are a <a href="https://www.masswerk.at/rc2018/04/08.html">few registers which store collision information</a>.
And here they are:</p>

<table>
  <thead>
    <tr>
      <th>Reg. name</th>
      <th>Reg. address</th>
      <th>7th bit</th>
      <th>6th bit</th>
    </tr>
  </thead>
  <tbody>
    <tr>
      <td><code class="language-plaintext highlighter-rouge">CXM0P</code></td>
      <td><code class="language-plaintext highlighter-rouge">0x0</code></td>
      <td><code class="language-plaintext highlighter-rouge">M0-P1</code></td>
      <td><code class="language-plaintext highlighter-rouge">M0-P0</code></td>
    </tr>
    <tr>
      <td><code class="language-plaintext highlighter-rouge">CXM1P</code></td>
      <td><code class="language-plaintext highlighter-rouge">0x1</code></td>
      <td><code class="language-plaintext highlighter-rouge">M1-P0</code></td>
      <td><code class="language-plaintext highlighter-rouge">M1-P1</code></td>
    </tr>
    <tr>
      <td><code class="language-plaintext highlighter-rouge">CXP0FB</code></td>
      <td><code class="language-plaintext highlighter-rouge">0x2</code></td>
      <td><code class="language-plaintext highlighter-rouge">P0-PF</code></td>
      <td><code class="language-plaintext highlighter-rouge">P0-LB</code></td>
    </tr>
    <tr>
      <td><code class="language-plaintext highlighter-rouge">CXP1FB</code></td>
      <td><code class="language-plaintext highlighter-rouge">0x3</code></td>
      <td><code class="language-plaintext highlighter-rouge">P1-PF</code></td>
      <td><code class="language-plaintext highlighter-rouge">P1-BL</code></td>
    </tr>
    <tr>
      <td><code class="language-plaintext highlighter-rouge">CXM0FB</code></td>
      <td><code class="language-plaintext highlighter-rouge">0x4</code></td>
      <td><code class="language-plaintext highlighter-rouge">M0-PF</code></td>
      <td><code class="language-plaintext highlighter-rouge">M0-BL</code></td>
    </tr>
    <tr>
      <td><code class="language-plaintext highlighter-rouge">CXM1FB</code></td>
      <td><code class="language-plaintext highlighter-rouge">0x5</code></td>
      <td><code class="language-plaintext highlighter-rouge">M1-PF</code></td>
      <td><code class="language-plaintext highlighter-rouge">M1-BL</code></td>
    </tr>
    <tr>
      <td><code class="language-plaintext highlighter-rouge">CXBLPF</code></td>
      <td><code class="language-plaintext highlighter-rouge">0x6</code></td>
      <td><code class="language-plaintext highlighter-rouge">BL-PF</code></td>
      <td><strong><em>unused</em></strong></td>
    </tr>
    <tr>
      <td><code class="language-plaintext highlighter-rouge">CXPPMM</code></td>
      <td><code class="language-plaintext highlighter-rouge">0x7</code></td>
      <td><code class="language-plaintext highlighter-rouge">P0-P1</code></td>
      <td><code class="language-plaintext highlighter-rouge">M0-M1</code></td>
    </tr>
  </tbody>
</table>

<p>This table shows what is stored in each bit of each register.
For example, if <code class="language-plaintext highlighter-rouge">P0</code> and <code class="language-plaintext highlighter-rouge">P1</code> are colliding, 7th (last) bit of the <code class="language-plaintext highlighter-rouge">CXPPMM</code> register will be set to <code class="language-plaintext highlighter-rouge">1</code>.</p>

<h2 id="passing-through-enemies">Passing through enemies</h2>
<p>Now that we know which register stores <code class="language-plaintext highlighter-rouge">P0-P1</code> collision; We can search the disassembly to see when it is read.</p>

<p>Unfortunately I couldn’t find a way to do that automatically in Stella (like the “find” operation in many text editors). But there are two other ways for doing that:</p>
<ol>
  <li>Scrolling throw the disassembly section of the Stella and look for <code class="language-plaintext highlighter-rouge">CXPPMM</code> (It actually works because the program is pretty small)</li>
  <li>Write a code to do that for us</li>
</ol>

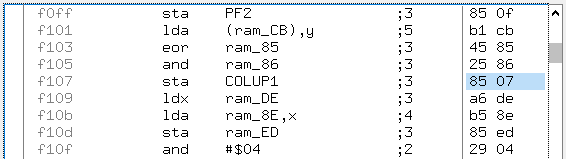
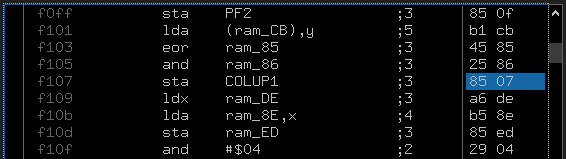
<p>First way is pretty straight forward. But second one is <em>a bit</em> harder. Because if you want to search for a bit with value of <code class="language-plaintext highlighter-rouge">0x7</code> (<code class="language-plaintext highlighter-rouge">0x7</code> is the address of <code class="language-plaintext highlighter-rouge">CXPPMM</code>); You will get alot of matches which do not <em>actually</em> mean <code class="language-plaintext highlighter-rouge">CXPPMM</code>. Like this one:</p>

<p style="position: relative;">
<img class="hide-in-dark-mode" alt="color_codes" src="/assets/cracking-river-raid/7l-cropped.png" />
<img class="hide-in-light-mode" alt="color_codes" src="/assets/cracking-river-raid/7d-cropped.png" />
</p>

<p>Here, <code class="language-plaintext highlighter-rouge">0x07</code> is interpreted as <code class="language-plaintext highlighter-rouge">COLUP1</code> instead of <code class="language-plaintext highlighter-rouge">CXPPMM</code>.</p>

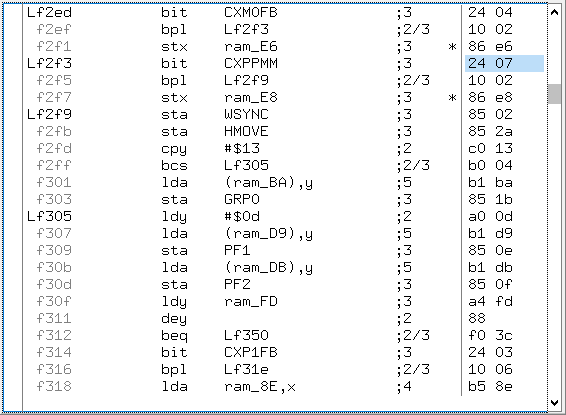
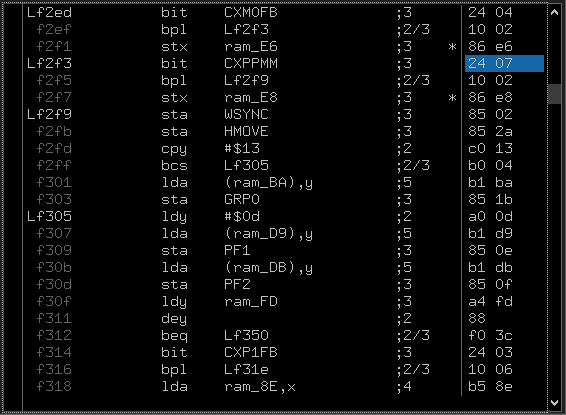
<p>By following first way, you will find the first match at address <code class="language-plaintext highlighter-rouge">0x2f3</code> (aka <code class="language-plaintext highlighter-rouge">f2f3</code>):</p>

<p style="position: relative;">
<img class="hide-in-dark-mode" alt="color_codes" src="/assets/cracking-river-raid/8l-cropped.png" />
<img class="hide-in-light-mode" alt="color_codes" src="/assets/cracking-river-raid/8d-cropped.png" />
</p>

<p>Great! But what does it mean?</p>

<p>Looking at <a href="https://www.c64-wiki.com/wiki/BIT_(assembler)">here</a>, it says:</p>
<blockquote>
  <p>Bit 7 (…) is transferred directly into the negative flag.</p>
</blockquote>

<p>Did you notice that?!</p>

<p><code class="language-plaintext highlighter-rouge">bit CXPPMM</code> will do alot of stuff. One of which is moving 7th bit of the <code class="language-plaintext highlighter-rouge">CXPPMM</code> register to proccessor’s negative flag.</p>

<p>So if the value stored in the negative flag is <code class="language-plaintext highlighter-rouge">1</code>, then <code class="language-plaintext highlighter-rouge">P0</code> is colliding with <code class="language-plaintext highlighter-rouge">P1</code>!</p>

<p>The next instruction is <code class="language-plaintext highlighter-rouge">bpl Lf2f9</code>. <code class="language-plaintext highlighter-rouge">bpl</code> means “jump if positive”. Being positive means that the negative flag is set to <code class="language-plaintext highlighter-rouge">0</code>.
So if the negative flag is set to <code class="language-plaintext highlighter-rouge">0</code>, it will jump to the instruction at location <code class="language-plaintext highlighter-rouge">0x2f9</code>.</p>

<p>These two instructions can roughly be translated to plain English as:</p>
<blockquote>
  <p>If <code class="language-plaintext highlighter-rouge">P0</code> and <code class="language-plaintext highlighter-rouge">P1</code> are not colliding, jump to <code class="language-plaintext highlighter-rouge">0x2f9</code> and continue execution from there.</p>
</blockquote>

<p>Doing the jumps means skipping the code between <code class="language-plaintext highlighter-rouge">0x2f5</code> and <code class="language-plaintext highlighter-rouge">0x2f9</code> (Which happens to be only a single instruction: <code class="language-plaintext highlighter-rouge">stx ram_E8</code>). So it is probably where increasing fuel and/or losing the game by hitting enemies is handled. (Remember, both enemies and fuel <em>stations(?)</em> as rendered as <code class="language-plaintext highlighter-rouge">P1</code>) So we probably need to remove that code!</p>

<p>But we can’t just delete those two bytes, because it will mess up code layout and jump locations. So we should replace them with something which does nothing.</p>

<p>Hopefully, there is a <code class="language-plaintext highlighter-rouge">nop</code> instruction which means “No Operation”. It does nothing. We can change <code class="language-plaintext highlighter-rouge">stx ram_E8</code> to <code class="language-plaintext highlighter-rouge">nop nop</code>. (Instructions can have different sizes. <code class="language-plaintext highlighter-rouge">stx ...</code> needs 2 bytes but <code class="language-plaintext highlighter-rouge">nop</code> can be stored in a single byte. It means we need two of them to fill the entire 2 bytes of the previous <code class="language-plaintext highlighter-rouge">stx</code>.)</p>

<p>You can’t directly write assembly code in Stella, as it only allows you to modify the assembly directly in hex. But I’ve got you covered! The hex equivalent to <code class="language-plaintext highlighter-rouge">nop</code> is <code class="language-plaintext highlighter-rouge">0xEA</code>. So just double click on the hex on the right side and replace <code class="language-plaintext highlighter-rouge">86 e8</code> with <code class="language-plaintext highlighter-rouge">ea ea</code>. (Why don’t we have a Valve instruction? 🤔)</p>

<p>Similarly, repeat the same replacement at location <code class="language-plaintext highlighter-rouge">0x487</code>.</p>

<p>Now hit the <code class="language-plaintext highlighter-rouge">Run</code> button (or the <code class="language-plaintext highlighter-rouge">Exit</code> button on older versions) at the top-right corner and enjoy playing game without ever losing by hitting enemies!</p>

<h2 id="passing-through-hills">Passing through hills</h2>
<p>Likewise, you can tell that collision between the player and hills (<code class="language-plaintext highlighter-rouge">P0-PF</code>) is stored in the 7th bit of the <code class="language-plaintext highlighter-rouge">CXP0FB</code> register.
After searching for <code class="language-plaintext highlighter-rouge">bit CXP0FB</code>, you can find two matches at <code class="language-plaintext highlighter-rouge">0x2E7</code> and <code class="language-plaintext highlighter-rouge">0x462</code>. Both are followed by a <code class="language-plaintext highlighter-rouge">bpl</code> instruction; So replacing next two bytes after the <code class="language-plaintext highlighter-rouge">bpl</code> instructions with <code class="language-plaintext highlighter-rouge">ea ea</code> will make us fly through hills as well.</p>

<h2 id="endless-fuel">Endless fuel</h2>
<p>By tracking values stored in the RAM, you will be able to guess where the fuel level is stored. Test your guesses by modifying that value (try double-clicking!) and observing what happens next.</p>

<p>So here is my try (spoiler alert!):</p>

<p>After trail and error, it tured out that byte <code class="language-plaintext highlighter-rouge">0xb7</code> is the correct address.
Now by searching the code for that ram address, I found a <code class="language-plaintext highlighter-rouge">dec ram_B7</code> instruction at address <code class="language-plaintext highlighter-rouge">0x64c</code>. It basically decrements the value stored at the RAM at address <code class="language-plaintext highlighter-rouge">0xb7</code>. Replace that with <code class="language-plaintext highlighter-rouge">ea ea</code> and we are done.</p>

<h2 id="summary">Summary</h2>
<p>Overriding the 2 bytes these address are pointing to with <code class="language-plaintext highlighter-rouge">ea ea</code>:</p>
<ol>
  <li><code class="language-plaintext highlighter-rouge">0x2eb</code>  (for hills)</li>
  <li><code class="language-plaintext highlighter-rouge">0x2f7</code>  (for enemies)</li>
  <li><code class="language-plaintext highlighter-rouge">0x466</code>  (for hills)</li>
  <li><code class="language-plaintext highlighter-rouge">0x487</code>  (for enemies)</li>
  <li><code class="language-plaintext highlighter-rouge">0x64c</code> (for fuel)</li>
</ol>

<p>Will eventually turn one of the most iconic and popular games of the 1980s to a boring, possibly <a href="https://en.wikipedia.org/wiki/Zero-player_game">zero-player</a> game. Bye!</p>]]></content><author><name></name></author><summary type="html"><![CDATA[I went through cracking an old Atari game with the help of an emulator]]></summary></entry></feed>